Friday, May 31, 2019

Miss Katecuttables zoo fun paper pack: Birthday Card


The inspiration for this card came from Janis Lewis who has a blogspot at pausedreamenjoy.blogspot.com. Check out her site for daily inspiration. Janis has a wonderful, beautiful cards that she shares everyday. I always enjoy looking at her lovely cards every day. 

This card came from a card  sketch from mojomonday. Check out this blog for other card sketch ideas. It is a great tool for when you need a card, but you are stuck on what to do.

Materials used:


Dimensions:
  • Card Base: 4.25 in. by 5.5 in.
  • Large Black Math: 4 in. by 5.25 in.
  • Green giraffe border: 3.75 in. by 5 in.
  • Medium size black mat: 3.5 in. by 3.55 in.
  • Plaid mat: 3.25 in. by 3.25 in.
  • Small black mat: 3 in. by 3 in.
  • Green polka dot mat: 2.75 in. by 2.75 in.
  • Hat and balloons were the cut at the size that it first comes up in design space. I did not resize it.


Tuesday, May 28, 2019

Beach Retirement Card


Materials used:
card stock with a white core inside: brown and blue
lawn chair image created with inkscape
umbrella image created with inkscape
Sun image created with basic circles in Cricut design space
Cardztv mixed messages stamp set
art glitter glue
foam tape


Dimensions used:
Card base: 4.25 in. by 5.5 in.
brown beach base:   2 by 5.5 in.
blue ocean base:    0.75   by 5.5 in.
sky background: 4.25 in. by 5.5 in.
lawn chair: 2.5 in. by 2 in.
umbrella 2.75 in. by 2.25 in.
sun: 1 in. by 1 in.

Challenges entered:
Cardztv anything goes #90

TTCRD Anything Goes Challenge, week of May 28, 2019


Tuesday, May 21, 2019

2019 Graduation card


Materials used:
2019 image
graduation hat image
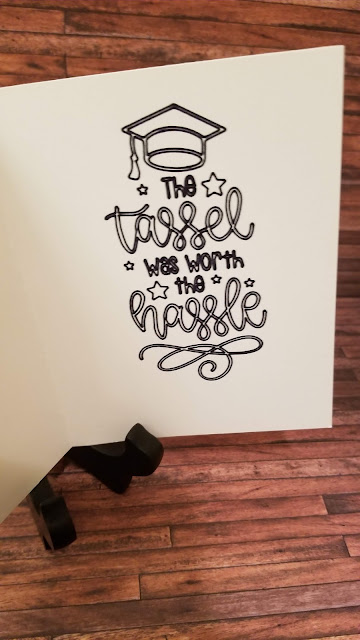
The tassel is worth the hassle image - found in cricut design space (Graduation hat designs cartridge)
Darcie Graduation Hat Background embossing folder
The paper studio glitter paper
Graduation scroll came from teddy bear parades cricut cartridge on design space
congratulations sentiment from cardztv mini messages

Dimensions:
Card base: 4.25 in. by 5.5 in.
Silver glitter mat: 4 in. by 5.25 in.
White graduation hat embossed mat: 3.75 in. by 5 in.
Class of 2019 logo: 3.15 in. by 1.25 in.
Graduation hat: 1.254 in. by 0.869 in.
scroll: 0.73 in by 1.25 in.
banner: 1 in. by 3 in.

Challenges entered:
cardztv anything goes #89
TTCRD anything goes May 21
http://yourscrapbookplace.blogspot.com/
Lil Patch Anything goes challenge #105
Crafts Galore Encore Challenge Blog May anything goes challenge #63
Crafting by design May anything goes


Thursday, May 16, 2019

Teddy Bear Parade Graduation Card


I made this card for my senior students that I teach. Our school mascot is a bear, so I felt like the teddy bear parade cartridge was a perfect fit.

Materials Used:

Dimensions used:
  • Card base: 4.25 in. by 5.5 in.
  • Dark blue math 4 in. by 5.25 in.
  • White embossed mat: 3.75 in.by 5 in.
  • Teddy bear size: 1.8 in by 2.7 in.
  • Dark blue sentiment mat: 3.75 in. by 1.25 in
  • White sentiment mat: 3.5 in. by 1 in.
I used the cricut to write my sentiment inside my card using the snap mat feature on my ipad. I had to hide everything but the sentiment, since it is a lot of writing. To cut out my project, I had to hide the inside of my sentiment in order for the cricut machine to be able to process all of the data. Please watch the video on how to assemble my card. Here is a link to the cut file that I used on cricut design space: https://design.cricut.com/#/design/59734656

Contest entered into: Cardztv anything goes #89
                                  TTCRd anything goes week of May 14  
                                  http://yourscrapbookplace.blogspot.com/
                                  Lil Patch Anything goes challenge #105
                                  Crafts Galore Encore Challenge Blog May anything goes challenge #63
                                  Crafting by design May anything goes
                                  Creatalicious Challenge challenge #163 anything goes

Tuesday, May 14, 2019

How to store your distress ink/oxide foam blending pads


To store my distress ink/oxide foam blending pads, I am using a jewelry container that I had found at Walmart. This will store flat on a shelf where you can put other things on top of it. I also liked how each foam blending pad had it's own container. I used Avery labels, cut to 1.25 inch circle to fit on the top of the container so that I can separate out the different colors. These labels would also be great to use for masking stamps. I really think that I will like this method better for storing my ink foam blending pads.

Friday, May 10, 2019

Happy Aunt's Day Butterfly Card


In addition to mother's day cards, I think that aunts are pretty spectacular and also need celebrated. 

Materials needed:

Card size:

  • Card base is 4.25 in. by 5.5 in.
  • dark blue mat is 4 in. by 5.25 in.
  • white mat is 3.75 in. by 5 in.
  • black sentiment mat is 3 in. by 1 in.
To create this card, I inked the background first with the distress inks. Then sprayed that with water and stamped the butterflies. I then colored the butterflies with alcohol markers in blue and teal colors. I cut the black mat out with my cricut cutting machine using elegant edges. I foiled the sentiment on with the foiling quill. I put a ribbon in behind the sentiment to give the card some texture. I don't think this technique would work if you were to color the butterflies in any color other than blue. If you wanted a red butterfly, I would stamp the butterfly first and then put a mask over it to do the background. 

Wednesday, May 8, 2019

Floral Mother's Day Card Using Deco Foil Transfer Gel


Materials needed:
Card sizes:
  • Card base is a 4.25 in. by 5.5 in.
  • large dark pink mat is 4 in. by 5.25 in.
  • large light pink mat is 3.75 in. by 5 in. 
  • small dark pink mat is 3.25 in. by 4 in.
  • small light pink foiled mat is 3 in. by 3.75 in.
  • flower is 3.5 in. by 3 in.
Please watch my video on how to assemble the card.

I am very lucky that my mom is still alive and that I can give her a card. I am grateful for all of the scarifies that she had made for me growing up. I really hope that she knows how much I love her and that she enjoys my card.


Contests entered into: May Flower challenge #191: Crafty Gals Corner

Monday, May 6, 2019

Comparing Deco Gel Foiling with We R Memory Keepers foil quill


We R Memory Keepers Foiling Quill

The We R Memory Keepers' foil quill gives a beautiful shine to any project but how does that compare to Deco Foiling Gel? Honestly, I liked the foil quill better, but I saw some great aspects of the Deco Foiling Transfer Gel.
The positive aspects of the Deco Foiling Transfer Gel:
  • Foiling can be more than just an outline
  • You get a nice embossed impression
  • Reasonably priced
  • Gel has a long shelf life

Negative aspects of the Deco Foiling Transfer Gel:
  • The laminator may miss some spots on the foil
  • Must wait an hour for the glue to be set in order to foil
Deco Foil Transfer Gel
I like that you can foil a large amount of space with the Deco Foil. It is very affordable and easy to do. The Deco Foil Transfer Gel gives your card more texture. Both foiling types have their own unique properties and would be good for different projects. 

****STAY TUNED FOR A NEW POST ON WEDNESDAY WHERE WE WILL USE THE DECO FOIL IN A CARD.***


Friday, May 3, 2019

Mother's Day Card using the We Are Memory Keepers Foiling Quill


For mother's day, I made a card using the we are memory keeper's foiling quill. I got fantastic results, and I highly recommend this product if you want to foil. The foil quill even allows for fine tip writing for the inside of cards. I bought the foil quill from my local A.C. Moore store and it is the only store that I have seen it in so far.

Materials needed:
Card size:
A2 (4.25 in. by 5.5 in.)
Pink mat: 4 in. by 5.25 in.
Floral mat: 3.75 in by 5 in.
Small Pink Mat: 2.75 in. by 1.25 in
Small white mat: 2.5 in. by 1 in.

Please watch my video on how to assemble the card.

Wednesday, May 1, 2019

Using the we are memory keepers foil quill and thoughts about it.


I really liked the we are memory keepers foil quill. I got great results. The foil looks very professional. One tip though is to make sure that the cord is in the center of your machine so that it doesn't pull or get stuck while cutting. You also cannot reuse the foil and the foil must be a heat activating foil. I do recommend using the we are memory keepers name brand foil. Stay tuned to see the finished product in the next post.

How to get special characters using a windows computer

Learn how to get special characters, such as the heart, in cricut design space. No uploading needed. Also, no need to download any special s...